
Hello friends,
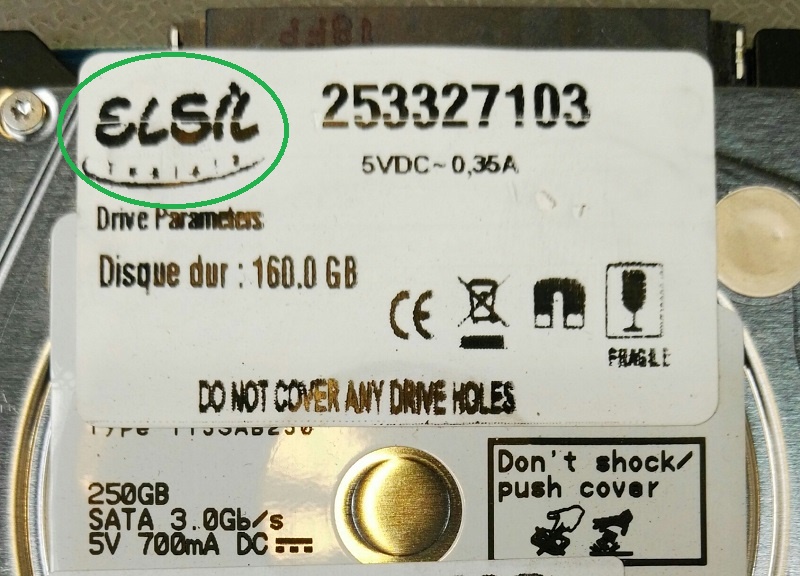
Many of you have encountered Hitachi HCCxxxx locked drives which were previously used in DVR. Those HDDs have different label with Elsil logo which is pasted above original Hitachi. If you connect such drive to PC it won’t be recognised via standart device manager…
Now we want to consider one of such examples and explain how to return it to normal conditions.
At the moment we have faced only 3 models which were locked by Elsil:
-
HCC543216A7A380 – 5432A7 160Gb
-
HCC543225A7A380 – 5432A7 250Gb
-
HCC545016B9A300 – 5450B9 160Gb
First 2 examples are related to Hitachi IBM-ARM architecture and last one is IBM. Solution for all variants is similar but we will show both examples!
- Lets take a look
HCC543216A7A380
firstly.
After Power On drive is spinning well and quickly going Ready state but utility can’t be started due the error message:
Techno mode key....................................... : ErrorError switching to techno mode
But drive initializes with correct ID. It means that SA is available and most probably not damaged!
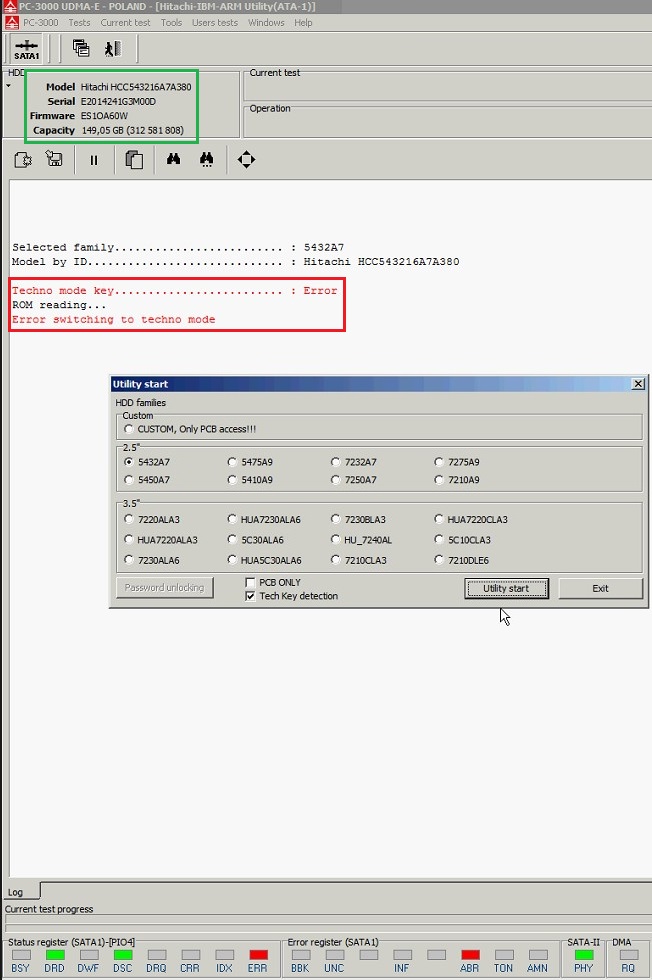
May appear that drive is locked by Password setting, but it’s not. To check it we can open universal utility:

We suggest that drive is healthy and has no password so what is wrong? Answer is simple – inside NV-RAM there is a ‘locking flag’ which prevents normal HDD initialization thus to unlock it we need to find this point and fix it. But how if utility even can’t be open?
Here are the steps:
1) Unscrew PCB from HDA and connect to PC-3000 Wait until it goes DRD+DSC and start ‘PCB only mode’:

2) Perform Rom and NV-RAM backup:

3) Open NV-RAM via HEX editor, press CTRL+G and go to 0x0D7E offset then change 04 ⇨ 00
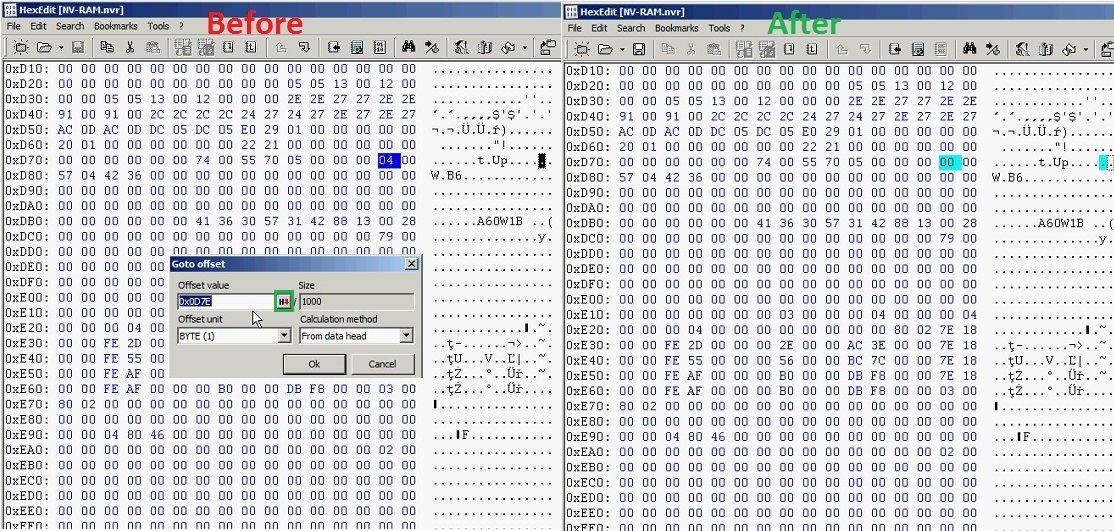
4) Save changes and write this new NV-RAM (Work with NV-RAM ⇨ Writing NV-RAM)
5) Repower the drive, restart the Utility and enjoy. HDD is initializing correctly for now with full User Area access (if there is no other problems of course)…

Don’t forget to perform full SA backup!
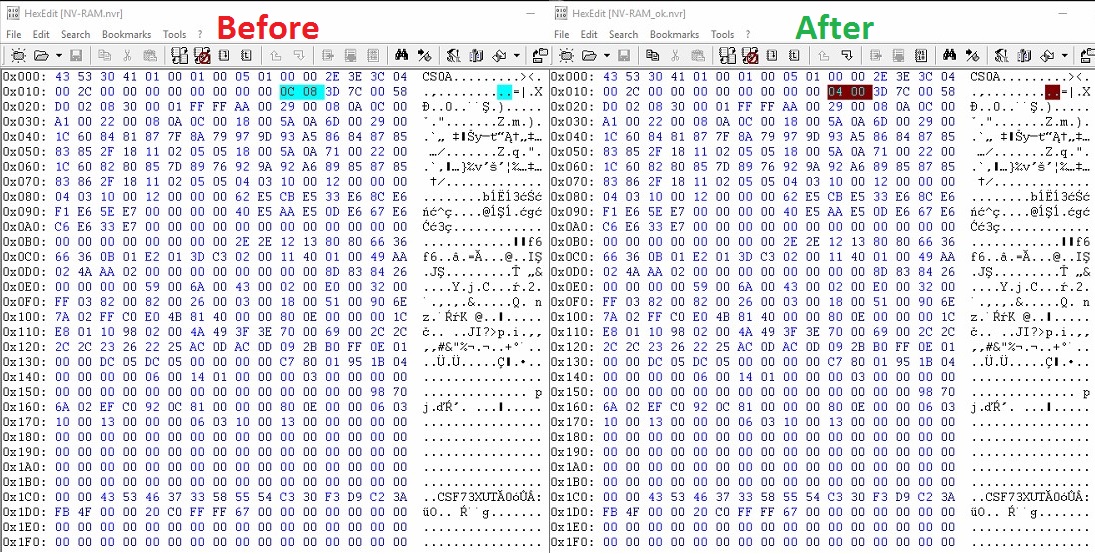
2. For HCC545016B9A300 solution is similar with 2 differences only:
1) To operate with this drive or its PCB you should use IBM (not IBM-ARM) utility and ‘Custom families’

2) ‘Locking flag’ is located by another offset here. So when NV-RAM is saved and opened press CTRL+G and go to 0x001A then change 0C 08 ⇨ 04 00
Other steps are the same.
It’s simple! Isn’t it? This is one of good examples when a few bytes can completely change drives behaviour and save your day also!


